Wednesday, July 30, 2014

Garden Progressions: Peppers

 
Ready or not, into the ground they go!
These peppers were tiny when they were planted out and they were very slow to get started.

We had snow in the forecast only one week after I planted them!  So I put together a poor man's hoop house with some rebar, pvc pipe and painters plastic held down with rocks.

Happily most of the peppers survived.  I only lost two yellow pepper plants and a green pepper plant to the cold weather.

I replaced them with a jalepeno and two purple pepper plants.

Lots of rain makes everything take off.

 
At this point The peppers have a smattering of flowers and a few small peppers here and there.  I seem to be having a lot of pepper flowers falling off the plants and some yellowing leaves at the bottoms.  I think they might be getting too much rain and not enough warm temperatures to be growing well this year.  I am trying to do a little hand pollinating when I see open flowers to try to get more fruit to set, just in case the flowers are dropping because they are not being pollinated well.  It has taken awhile to see many pollinators in my garden which concerns me a little bit.  Thankfully, once the squash really started flowering, the honeybees finally showed up, though there doesn't seem to be many of them in the garden.  Maybe I should consider getting my own hive at some point.

Monday, July 28, 2014

Dandelion Wine

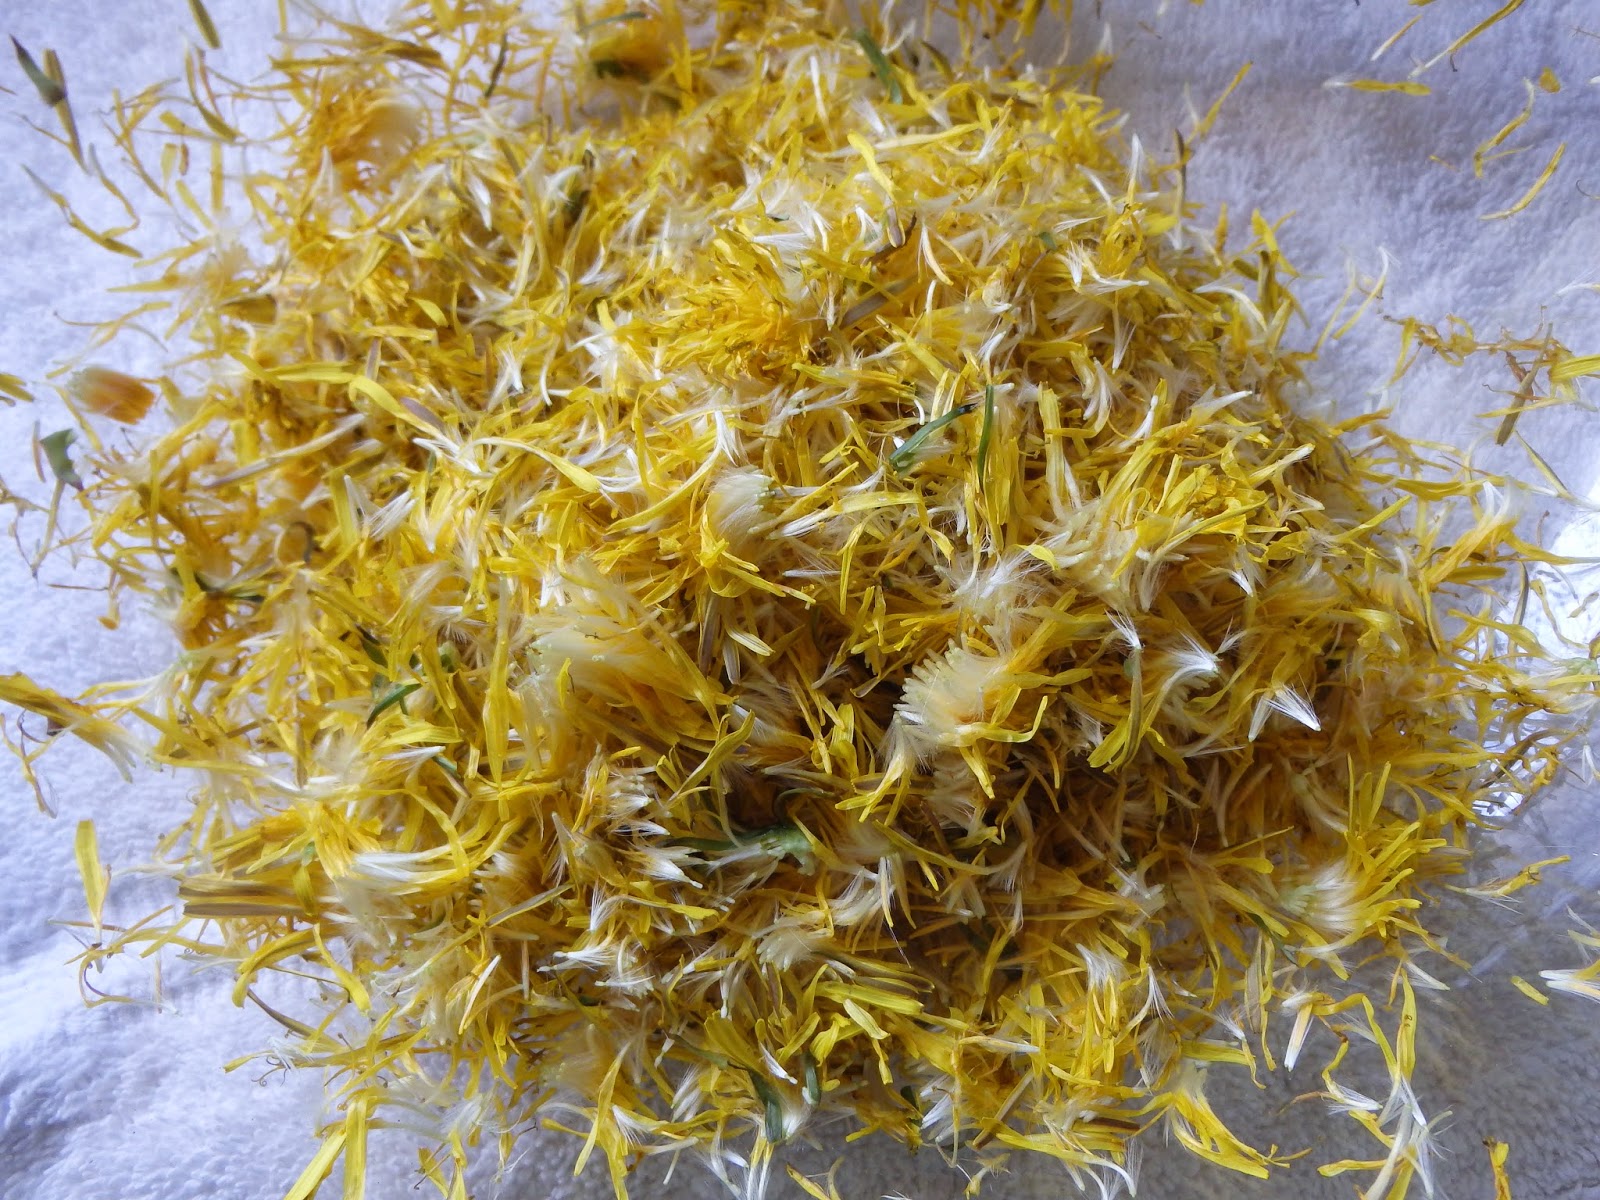
I believe it was the middle of May when the idea came to mind to try making dandelion wine.  I had a multitude of dandelions dotting my yard and a long weekend in which to get started, so start I did.  I followed a recipe from Jack Keller's Wine making website which is a great website to visit if you are learning how to make wine.  The recipe calls for about 2 quarts of dandelion flower petals.  Some recipes use whole flowers, but this one just called for the petals which tends to make a less bitter wine because the green parts of the plant are what make the bitter flavor.  So I spent a good half hour plucking dandelions from their stalks.  I think I ended up with a half gallon of flowers in the end.
 
Once the flowers were all washed I then proceeding to remove flower petals from the base of the flowers one pinch at a time.  It was a messy and tedious job and it took me about and hour and a half and left me with yellow sticky fingers when I was done.

 
While I was preparing my petals I had set a gallon of water on the stove to boil.  Once it had reached a nice boil I poured it over the flower petals and then covered the mixture with a towel. 
 
 
After two days of steeping I strained the liquid and once again brought it to a boil.  I added six cups of sugar to the liquid which at this point was a lovely golden amber color.  While it was boiling I carefully peeled the rind from four ripe oranges doing my best to not have any of the pithy white part in my shavings.  Once peeled I then juiced the oranges and added the juice and the rind shavings and let it boil for ten minutes.  Once the ten minutes was up I removed the pot from heat and waited until the temperature came down to about 105 degrees.  At that point I added a packet of champagne yeast and one teaspoon of yeast nutrient.  Once everything was well mixed and had started to bubble I transferred all the liquid into a one gallon glass jug and fitted it with an airlock.
 
 
I set the happily bubbling jug in a closed box in the corner where it could ferment in peace in the dark.  After about a month I had noticed that it wasn't bubbling anymore so I racked the wine into a clean jug leaving behind all the dead yeast that had built up a thick sediment in the bottom.  I refitted the airlock and then left it in the jug for another month, just to be sure that it was finished fermenting.
 
Once I was satisfied that there was no more fermenting taking place I cleaned up my wine bottles and rinsed them with boiling water just to make sure they were as sterile as possible.  Then one by one I filled them and corked them.
 
Here the finished product sits glowing in the sun.  The recipe states that the flavor improves with time and should be aged for at least 6 months before drinking.  However I had one bottle that I could only fill half way, so into the fridge it went for sampling of course!  Considering that this wine has four more months to "improve" I think it may very well be phenomenal by that time.  As of right now it tastes like a flower mixed with honey with a touch of citrus.  It is a little on the sweet side though at first sniff you might think it was a dry wine.  It is also a touch on the strong side if my hydrometer readings are correct - somewhere in the realm of 14%.  Overall I'd have to say it's pretty darn good for a first attempt.
 

Saturday, July 26, 2014

Garden Progressions: Broccoli

From the smallest sprout:
 
Planted out seedlings.
 
Growing fast


Filling out

 
Heading up


Almost ready to harvest.
 
One good sized head for the first broccoli harvest.
This is the first time I've ever grown broccoli and it formed beautiful heads like this.  Every other year it always tried to bolt and most of the time I raced to harvest the side shoots before they went to flower.  Maybe it's all the rain we have been getting this summer as opposed to the hot, dry weather I tried to grow in the previous years.


Friday, July 25, 2014

Canning Dill Pickles


Though my own cucumber plants have yet to produce a single cucumber of edible size, my parents cucumbers have been working on overtime this week.  After a good sized harvest  it was clear that something had to be done, so we made dill pickles.

 
We did cheat a little bit with the recipe since we used a premixed blend of pickling spice, but sometimes less complicated is better.
 
First things first - we chopped the ends off of each cucumber and sliced them into spears
 
When the water bath was close to ready we mixed the pickling spice with the recommended amounts of water and vinegar and set it on the stove to boil.
 
When the jars were ready and everything was boiling, we took the jars out and packed them as best we could with spears.  Then we topped of the jars with the pickling brine and sealed them up before placing them back into the water bath.
 
 
It wasn't easy to get those spears into those jars and there seemed to be a lot of leftover space in each jar, but we only fit what we could.  We realized as we were filling the jars with brine that there might not be enough to fill them all, so we had to quickly whip up another batch (thank goodness for premixed salt and spices!)
 
We ended up with a total of five quarts of homegrown pickles and I have a feeling there will be plenty more of those before the season is over.
 
 
Can't wait to see how they taste in a few weeks!


Wednesday, July 23, 2014

Garden Progressions: Onions

Empty bed, freshly planted.
 
The first tips poking up

They grow an inch a day I swear!
 
Glowing with the sunset.

Filling out nicely.


No bulbs yet!
Here they have started to fall over, though most only show the slightest signs of bulbing up.

Within a week or two, the rest have fallen.  I am waiting for a dry spell so I can harvest them.
 
The brief dry spell had arrived so out they came!

 
If you can believe it, I planted the same number of red and yellow onions this spring.  However we had a ton of rain while they were growing and many of the plants had begun to rot in the ground.  The red onions performed very poorly - very few of them made any decent sized bulb and most of them had to be thrown in the compost heap because they turned to mush in my fingers.  The yellows faired better, though I still had to compost a lot of those as well.  After a day of curing in the sun, they came inside to finish drying on my wire shelves.  All in all it wasn't a terrible harvest, though I worry about how well they will keep in this humid climate. 


Monday, July 21, 2014

Canning Peaches

On Sunday I went to the local farmers market and procured 4 tubs of ripe, juicy peaches fresh from a local farmer.  They were perfectly round and had the deepest red blush and they smelled like a refreshing summer day.  It's nice to be able to get peaches that are picked just as they become ripe because they have so much more flavor than the peaches in the local chain grocery stores that are picked green and ripen in warehouses. 

The next day canning commenced.  We started by filled the canning pot and putting it on to boil.  Next we filled a smaller pot with water to boil for skinning the peaches.  As that reached the boiling point I made up a bowl of ice water and began to wash the peaches.  Since we had a good number of peaches we processed them in batches. 

First they go into the boiling water bath for two minutes.  Next they were transferred to the ice water bath.  After a few seconds in there the skins slipped of easily.  Once they were skinned they were cut into slices which is easier said than done.  Those peaches are slippery little suckers without their skins!  When it was all said and done we had two heaping bowls of peach slices.

 
The next step involved making the syrup for the peaches.  It is really much easier than it sounds.  All I did was mix 2 1/4 cups of sugar with 5 1/2 cups water.  I stirred until all the sugar dissolved and then put it on the stove to boil.
 
Once the canning jars were ready I removed them from the water bath and we filled them with the slippery slices, packing as many as we could into each jar.  Then we topped them off with the boiling syrup, wiped the rims and put the lids on securely.  Next they went back into the boiling water bath where they happily bubbled away for the next 25 minutes. 
 
When time was up I took them out of the canner and let them cool on the counter until their lids popped, letting me know they all sealed well.  All in all we canned ten pints of peaches today....not bad for a few hours work..
 
 
Not only do I love the way these jars of beautiful summer freshness look, but I love knowing exactly what went into making them.  The only ingredients are peaches, sugar and water, and that is all I really want in the something like this.  When I open one of these cans on a cold winter night, I will appreciate the afternoon that I spent making them as well. 

Saturday, July 19, 2014

The Begining of the Kitchen Herb Garden

There is a good sized patch of dirt nestled next to the house that is outlined by the porch, a shed and a asphalt pathway.  Early in the spring the snow next to the house is the first to melt and there is where I planted some peas - just after the snow melted back a little.

When they did finally come up there were only a few here and there, so I planted again when it was a little warmer.
When those started coming up I added a row of carrots to the front of them.  I also started planting out the lettuce seedlings as they started to size up enough to withstand transplanting.  They filled the upper right hand corner of the bed.  The rest of the bed was to become a mishmash of various herbs that I hope to have back every year, and some that are annuals.
 
In the mix are: Basil, Oregano, Thyme, Rosemary, Sage, Parsley, Chives, Cilantro, Chamomile and Echinacea.  I also managed to squeeze about six celery plants near the lettuce. 
 
I find this little garden patch very convenient since it is just outside the back door to the kitchen.  Even while I am cooking I can simply step outside with a pair of scissors and a bowl and come back in with fresh herbs or veggies for my meal.  Doesn't get any fresher than that!
 

Friday, July 18, 2014

Garden Updates: Warm Weather Plantings

I put the warm weather plants in the ground the weekend of Mother's Day.  That is the generally accepted planting time in this area, and I was happy that the garden was ready by this time, since I had only just turned it over a few weeks before.

The peppers were a touch on the small side when they went into the ground, but they did have a couple sets of true leaves so I wasn't too concerned.  Maybe next year I will start them sooner so they have time to size up before planting.  I started with five each of red, yellow and green pepper plants.
 
The tomatoes were begging to be planted when I got to put them out.  I was afraid that if I had waited any longer, they would become root bound and go into shock when I planted them.  The way it worked out seemed to be perfect timing for them - they never skipped a beat after going into the garden.  I am also happy that I was able to put their cages in at the same time.  Had I waited long, I never would have gotten the cages around them.
 
On the other side of the tomatoes I put up a bean trellis, cucumber cages and a row of squash.  All of these were planted as seeds and seemed to have a hard time getting started this year, probably due to a cold spell that hit the week after I planted everything.  We actually had one last snow flurry near the end of May that didn't damage any of the actual plants, but may have killed off the sprouting seedlings in this bed.  Only four bean plants came up and only one squash.  I had to replant the entire section of the garden with beans, cucumbers and squash....I even had to replant one of the squash hills a third time because I must have used some old seeds.  Needless to say, this end of the garden got off to a late start this year!
 

Thursday, July 17, 2014

Garden Updates: Spring planting

These are a handful of pictures that I took after putting the first plantings in the garden.  I believe they were taken in early to mid May.
 This section of the garden was planted in potatoes with eight Purple Majesty, eight Red Norland, and four Yukon Gold.  The seedlings I planted were sprouted potatoes that weren't eaten this winter because they started to grow in the pantry.  They were long and gangly, but that didn't seem to stop them from taking off once they were in the dirt.
 
Next to the potatoes are the onion sets.  I planted three rows of red and three rows of yellow and they all came up nicely.
 
The last thing I planted in that early garden was the brassica bed.  I ended up with five Broccoli, three Brussel Sprouts and one lonely Red Cabbage  - all started from seed in my living room. 
 
The warm loving plants had to wait a few more weeks before they were hardened off enough to plant out.  Winter was taking it's sweet time giving way to spring this year.


Wednesday, July 16, 2014

Garden Updates: Take One

Seeing as it is now midsummer and I am just now able to catch up of garden updates I thought we could go back in time a bit and see a few garden progressions - you see I was still taking pictures for my own records.

So here goes:

I ended up creating an odd shaped garden this year due to having to leave some decorations in place for the time being.  The main section of the garden is 10x15 feet with a 10x5 extension on the side.  Eventually it will become a 20x15 rectangle or a 20x20 square.

Pulling up the sod was the hardest and longest chore of getting this garden started.
It took me a few weekends and a shovel, but I did it.
 
After the sod was gone I spread a few bags of mushroom compost over the area to give it a little boost.
Finally I turned over the dirt one final time with my trusty shovel.
 
I am trying to make a point of not using any gas powered tools in this garden to see if I notice a difference in the soil quality.  I have read that rototilling is good for the initial turning over, but may create a layer  of hard packed dirt under the soft layer that plant roots have a hard time pushing through. 
 
I think I will be spoiled by this soft, dark Midwestern dirt.  It is definitely a contrast to the hard packed clay I had to deal with in the mountains.