Wednesday, November 12, 2014

Hand Made Hats

Have I mentioned that I crochet in my spare time?  One of my favorite things to make are hats
because there are infinite colors to mix and match and design is only limited by my own imagination.  I finally have worked up enough of a collection that I thought I would show them off here.


At some point I will have enough to make a decent display for a craft show.  The thicker hats are the easiest to make and are super warm.  The thinner hats can be very time consuming but are easier to work patterns into.  With thinner yarns I have even made a couple brimmed hats that are pretty cute though I need to figure out how to make the brims sturdier because they tend to collapse when I wear them.


Sunday, August 3, 2014

Garden Progressions: Potatoes

From humble beginnings:
 

The first to leaf up.

Most of the Red Norland did not come up by this point, but the others were all growing nicely.

A few weeks later, a lot of rain helped to fill in the gaps in this bed.

All the potatoes that did make an appearance are growing heartily.  I think I will be leaving them in the ground until the tops die back.  I am hoping for a good sized harvest from the looks of these happy plants.
 

Friday, August 1, 2014

Preserving Chamomile Flowers

Chamomile tea is one of my favorite warm drinks because of the flowery sweet taste.  This spring I started some chamomile plants from seed and planted them out in my herb patch  Only two of them survived but they grew very well once they got going. 
As you can see the plants have formed a nice mound which happens to be front and center in the herb patch.  The plants are positively loaded with flowers and it seems like the more flowers I pluck from the plant, the more flowers it makes to replace them.  I have been able to harvest the plant about once a week now for the last few weeks and I am preserving them by dehydrating them.
 
I usually wait until mid day to pick the flowers because that is when they are fully open.  Once I have gathered them I rinse them very well under cold water because there are many insects that are fond of the flowers also.  Then I lay them out on my dehydrator tray and set it to 95 degrees (the lowest setting) because I only want to dry them, not cook them.
 
At this setting it takes about two days to get them fully dry.  I usually wait until they crumble into dust when I pinch them. 
Once they are dry, there really isn't much left of them.  The finished product gets funneled into a jar where it awaits the next step in it's journey of becoming tea.


Wednesday, July 30, 2014

Garden Progressions: Peppers

 
Ready or not, into the ground they go!
These peppers were tiny when they were planted out and they were very slow to get started.

We had snow in the forecast only one week after I planted them!  So I put together a poor man's hoop house with some rebar, pvc pipe and painters plastic held down with rocks.

Happily most of the peppers survived.  I only lost two yellow pepper plants and a green pepper plant to the cold weather.

I replaced them with a jalepeno and two purple pepper plants.

Lots of rain makes everything take off.

 
At this point The peppers have a smattering of flowers and a few small peppers here and there.  I seem to be having a lot of pepper flowers falling off the plants and some yellowing leaves at the bottoms.  I think they might be getting too much rain and not enough warm temperatures to be growing well this year.  I am trying to do a little hand pollinating when I see open flowers to try to get more fruit to set, just in case the flowers are dropping because they are not being pollinated well.  It has taken awhile to see many pollinators in my garden which concerns me a little bit.  Thankfully, once the squash really started flowering, the honeybees finally showed up, though there doesn't seem to be many of them in the garden.  Maybe I should consider getting my own hive at some point.

Monday, July 28, 2014

Dandelion Wine

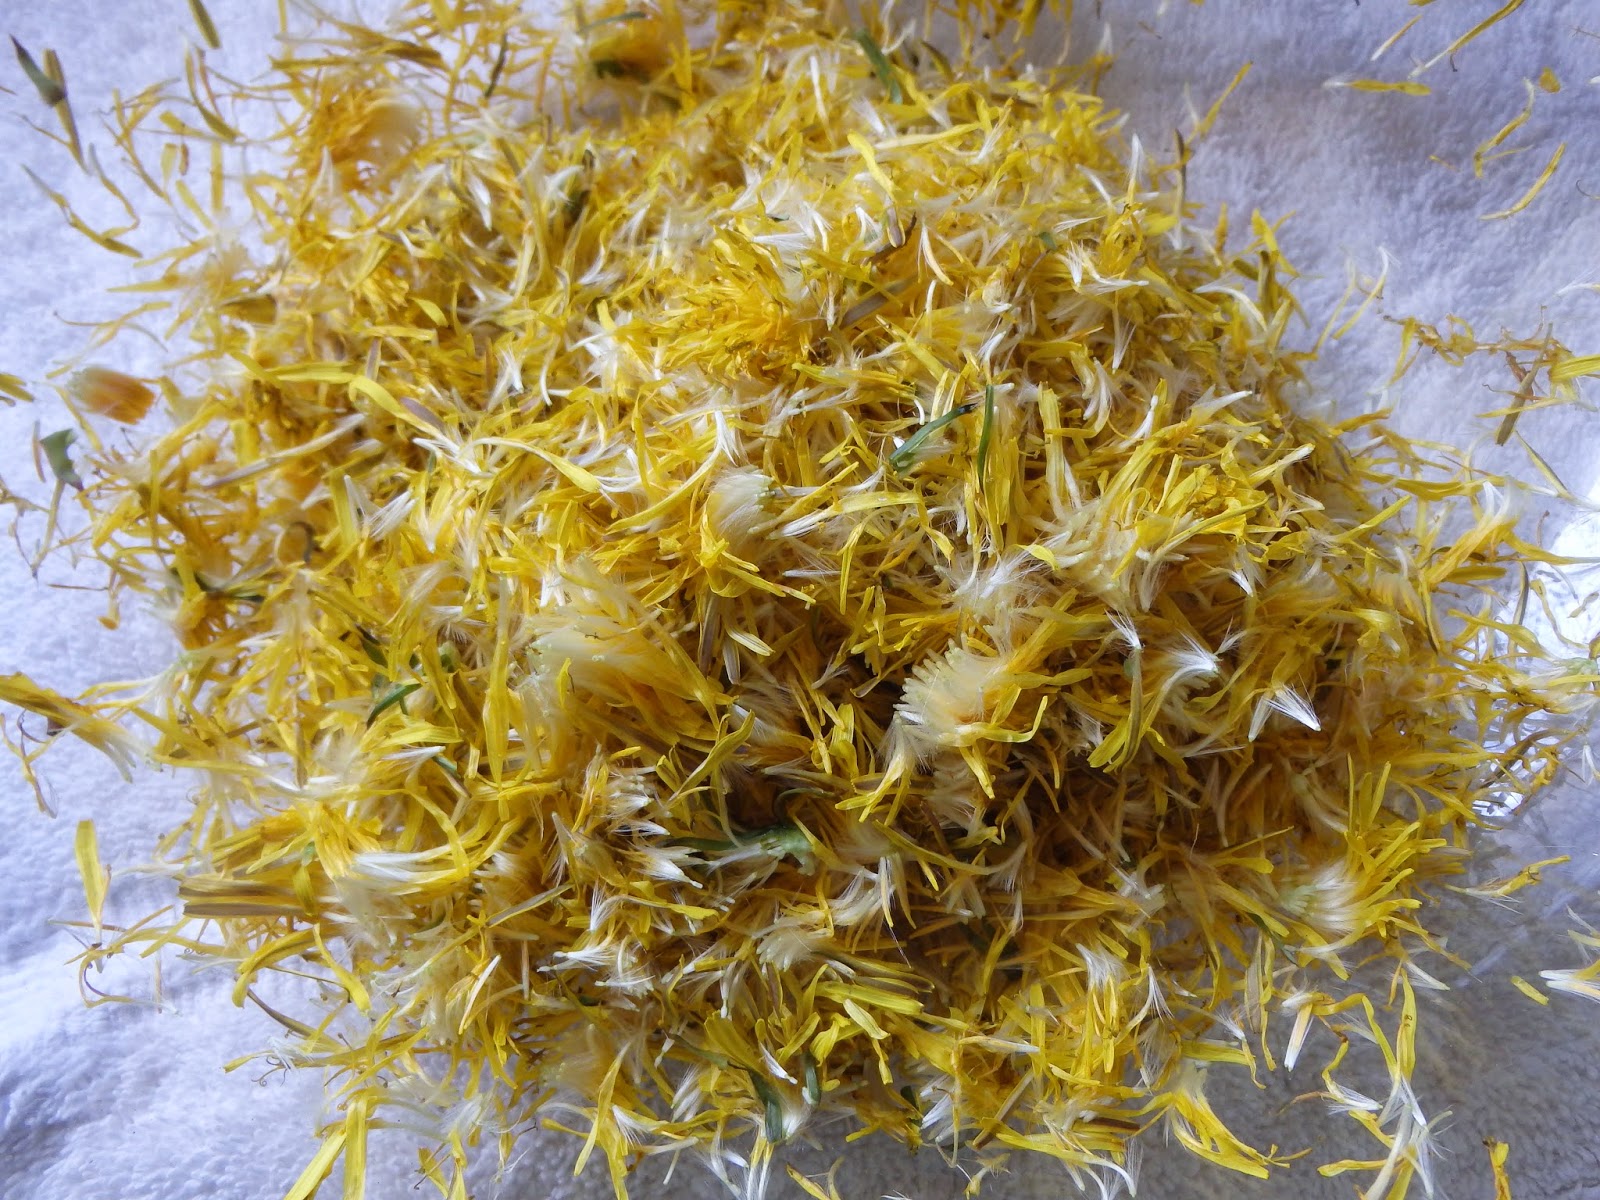
I believe it was the middle of May when the idea came to mind to try making dandelion wine.  I had a multitude of dandelions dotting my yard and a long weekend in which to get started, so start I did.  I followed a recipe from Jack Keller's Wine making website which is a great website to visit if you are learning how to make wine.  The recipe calls for about 2 quarts of dandelion flower petals.  Some recipes use whole flowers, but this one just called for the petals which tends to make a less bitter wine because the green parts of the plant are what make the bitter flavor.  So I spent a good half hour plucking dandelions from their stalks.  I think I ended up with a half gallon of flowers in the end.
 
Once the flowers were all washed I then proceeding to remove flower petals from the base of the flowers one pinch at a time.  It was a messy and tedious job and it took me about and hour and a half and left me with yellow sticky fingers when I was done.

 
While I was preparing my petals I had set a gallon of water on the stove to boil.  Once it had reached a nice boil I poured it over the flower petals and then covered the mixture with a towel. 
 
 
After two days of steeping I strained the liquid and once again brought it to a boil.  I added six cups of sugar to the liquid which at this point was a lovely golden amber color.  While it was boiling I carefully peeled the rind from four ripe oranges doing my best to not have any of the pithy white part in my shavings.  Once peeled I then juiced the oranges and added the juice and the rind shavings and let it boil for ten minutes.  Once the ten minutes was up I removed the pot from heat and waited until the temperature came down to about 105 degrees.  At that point I added a packet of champagne yeast and one teaspoon of yeast nutrient.  Once everything was well mixed and had started to bubble I transferred all the liquid into a one gallon glass jug and fitted it with an airlock.
 
 
I set the happily bubbling jug in a closed box in the corner where it could ferment in peace in the dark.  After about a month I had noticed that it wasn't bubbling anymore so I racked the wine into a clean jug leaving behind all the dead yeast that had built up a thick sediment in the bottom.  I refitted the airlock and then left it in the jug for another month, just to be sure that it was finished fermenting.
 
Once I was satisfied that there was no more fermenting taking place I cleaned up my wine bottles and rinsed them with boiling water just to make sure they were as sterile as possible.  Then one by one I filled them and corked them.
 
Here the finished product sits glowing in the sun.  The recipe states that the flavor improves with time and should be aged for at least 6 months before drinking.  However I had one bottle that I could only fill half way, so into the fridge it went for sampling of course!  Considering that this wine has four more months to "improve" I think it may very well be phenomenal by that time.  As of right now it tastes like a flower mixed with honey with a touch of citrus.  It is a little on the sweet side though at first sniff you might think it was a dry wine.  It is also a touch on the strong side if my hydrometer readings are correct - somewhere in the realm of 14%.  Overall I'd have to say it's pretty darn good for a first attempt.
 

Saturday, July 26, 2014

Garden Progressions: Broccoli

From the smallest sprout:
 
Planted out seedlings.
 
Growing fast


Filling out

 
Heading up


Almost ready to harvest.
 
One good sized head for the first broccoli harvest.
This is the first time I've ever grown broccoli and it formed beautiful heads like this.  Every other year it always tried to bolt and most of the time I raced to harvest the side shoots before they went to flower.  Maybe it's all the rain we have been getting this summer as opposed to the hot, dry weather I tried to grow in the previous years.


Friday, July 25, 2014

Canning Dill Pickles


Though my own cucumber plants have yet to produce a single cucumber of edible size, my parents cucumbers have been working on overtime this week.  After a good sized harvest  it was clear that something had to be done, so we made dill pickles.

 
We did cheat a little bit with the recipe since we used a premixed blend of pickling spice, but sometimes less complicated is better.
 
First things first - we chopped the ends off of each cucumber and sliced them into spears
 
When the water bath was close to ready we mixed the pickling spice with the recommended amounts of water and vinegar and set it on the stove to boil.
 
When the jars were ready and everything was boiling, we took the jars out and packed them as best we could with spears.  Then we topped of the jars with the pickling brine and sealed them up before placing them back into the water bath.
 
 
It wasn't easy to get those spears into those jars and there seemed to be a lot of leftover space in each jar, but we only fit what we could.  We realized as we were filling the jars with brine that there might not be enough to fill them all, so we had to quickly whip up another batch (thank goodness for premixed salt and spices!)
 
We ended up with a total of five quarts of homegrown pickles and I have a feeling there will be plenty more of those before the season is over.
 
 
Can't wait to see how they taste in a few weeks!