Friday, February 22, 2013

How our flock grew last year

There was no real plan in place when we got our first chickens.  We guessed about how many chickens would fit comfortably in our repurposed coop and took the plunge.  The six (then five)chickens seemed like a good fit and things were all good for that first year.

The following spring we had some friends stay with us for a couple weeks and in that time they bought us a gift...make that three gifts.....and they were baby chickens.  If I remember correctly two of them were welsummer chickens (the brown ones) and one was a black sex link chicken.  All three turned out to be hens - which is great - more eggs for everyone!


 Unfortunatly you can't just put baby chicks in with the big chickens.  The chicks would never survive the establishment of the pecking order (chickens can be brutal!), so while they grew up in their baby chicken brooder box we built a makeshift pen and coop right next to the original pen. 

The baby chicken coop was my attempt at making a broody box in case one of the original chickens decided that she wanted to hatch some eggs.  I made it using scrap lumber that our landlord gave us.  I think it only cost $10.00 and that was for the mesh sheet that made up the exercise portion of the box.


In any case, we had the pen servicable by the time the babies had learned how to escape from their brooder.

The next stage was to let the babies grow to their adult size in their safe and separate pen where the other chickens could see them and interact with them, but not hurt any of them.


Once they were big enough the babies were introduced into the main flock.  It took a couple weeks but they worked out all their differences and now happily sleep in the same coop at the big chickens.


Thursday, February 21, 2013

Garden Projects

Over the next few weeks the garden will be getting geared up for spring.  I have to clean up the beds I didn't get to before it got too cold.  I need to spead compost this year on more beds than I did last year.  Hopefully my compost bin is finally ready.  Out here things tend to take awhile to compost because its so dry. 

I started turning over the beds I want to use for lettuce.  It seems early to me but the ground has dried out enough and it's been warm enough that the soil is workable.

 
Last year this bed attempted to grow sweet corn.  The 5 ears we actually ate from it were delicious.


 This is the bed I am planning to plant lettuce and spinach in.  I am hoping to do succesion plantings of these this year so we have a more constant supply of lettuce.  I attempted to do that last year by direct sowing the lettuce in the garden.  This year I am going to start seedlings indoor every couple weeks and transplant them outside when they get sturdy enough.  I'm actually hoping to plant some lettuce outside under a small hoop house by March 21st. 
 
 
Last year this was a busy bed.  It started out as an onion and garlic bed which was followed by plantings of carrots and radishes.  I added a thick layer of compost to it to make up for being used so heavily last year.
 
 
Celery is in it's future.  I hope the plants do better this year than they did last year.  Our total celery harvest from last year barely filled a half pint jar when it was dried. 
 
Well that was enough for one weekend.  Next round of warm weather we are going to rent a rototiller.  Gotta love the heavy machinery!


Wednesday, February 20, 2013

Bean Trellis

The first year we grew a garden out here I decided to try to grow pole beans.  My father had always grown bush beans when I was growing up and I always found that picking them seemed tedious because you were always bent over trying to find the beans.  So pole beans were my choice.  Having never grown pole beans before I had no idea how tall a pole bean would grow, so I planted them along my four foot garden fence - on both sides of the garden.  I had no idea what I had gotten myself into.  Those beans quickly grew as tall as the fence and then started to reach for the sky.  Unfortunatly they got too heavy for that and just started to hang over the fence.  At the very least the wall of beans was nice for shade when you were picking out in the sun, but that many beans meant that I had to pick them every night for about 2 hours after work.  At their peak we were getting about two gallon ziplocs full of beans every night.  By the end of that season I never wanted to pick another green bean again!


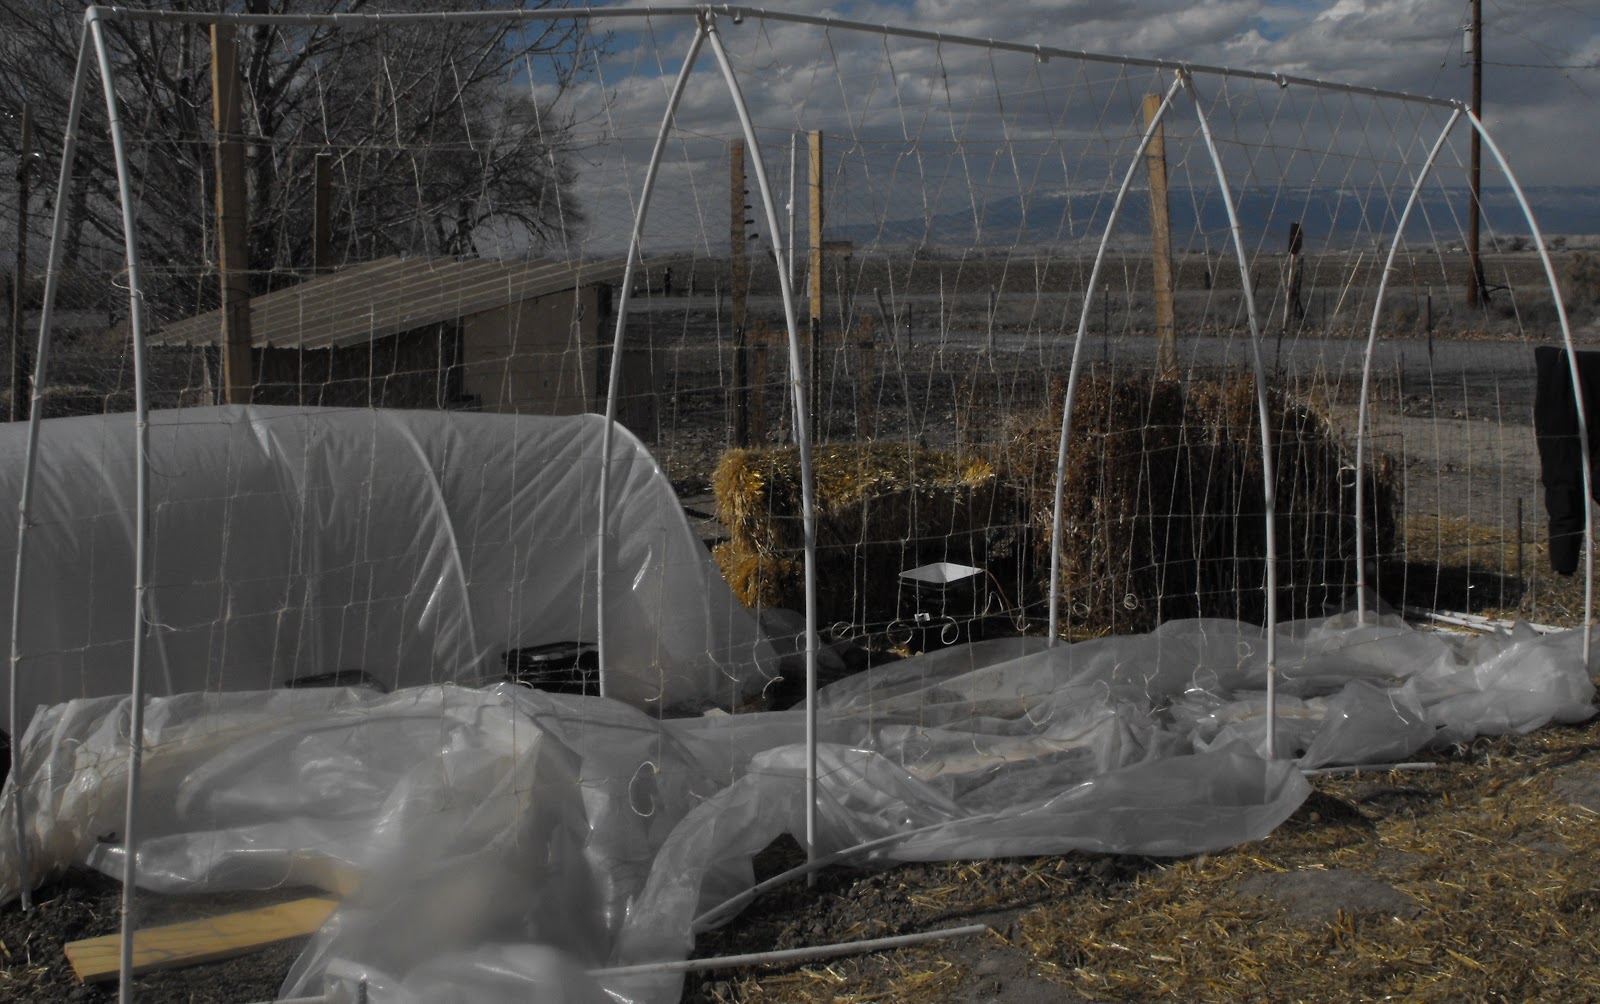
Last year I wanted to try something different.  My beans were going to go into a smaller bed this time around, but there was nothing to support the beans in the center of the garden.  My answer to this was a bean tunnel made from PVC pipes and some twine. 


To hold the pipes in place I pounded some 2 ft. rebar into the ground at four foot intervals.  The pipes slid over that and voila I had my basic framework.  It took a few rearrangements of the connecting pieces to make it all stay together, but you get the basic idea.  Now I had to give the beans something to climb up, so I drilled holes through the pipes at one foot intervals and wove the twine through them, basically making a large holed net.  The twine actually served two purposes - it gave the beans something to climb up and it helped to reinforce the pvc framework which was rather flimsy.  I was just glad that it could stand up to the wind that we get out here every spring. 


The trellis actually held up fairly well until the end of the season.  Again the monster beans had overgrown their trellis and thier weight was slowly but surely dragging the whole thing down to the ground.  By the end you could no longer walk through the tunnel and laying on your back picking beans is not quite as much fun as it sounds.  We had enough beans for the year, so near the end I kinda gave up on it and just let the whole thing collapse.  Maybe I will have better luck this year.....just need to build a sturdier trellis.


Tuesday, February 19, 2013

Chickens in the garden

Letting the chickens have free reign while the garden is sleeping keeps them highly entertained.  I love how they explore the whole yard, pecking and scratching as they do.  In early spring they "help" us as we turn over the garden beds.  You never know what tasty worms and grubs have been sleeping out of sight!

 In the summer they love to catch grasshoppers.  They will jump to get treats from your hand.  And when the others realize that there is a yummy snack to be had, they chase each other all over the yard to get it.


They also love to help themselves in the garden, so for the most part they are kept contained in that season.  As soon as the garden beds die back, they are let out again to help with clean up and spreading fertilizer (aka chicken poop).


Monday, February 18, 2013

Wine making

Last year I bought a wine making kit for my boyfriend for Christmas.  Having never made wine before we weren't quite sure what to expect with our first attempt. We decided to start with something simple so if we messed it up, we wouldn't be out a lot of money or effort, so Welch's grape juice wine is what we made.  I can't say that I remember the exact ingredients that we used but I think it went along the lines of grape juice (enough for 6 gallons), water, sugar, and wine yeast.  We decided not to use the Camden tablets or any other additives that web sites suggested because we just wanted to see if the basic process worked.

It all starts with mixing the grape juice, water, sugar and yeast in the fermentation bucket.  Once that is done it just needs to sit for about a week and bubble away.

The next step is to transfer the wine from the bucket into a glass carboy.  Thankfully the kit comes with a pump to make the job much easier and allows the sediment (aka yeast bodies and stuff) to remain at the bottom.  Once the wine was transferred we just corked it with the bubbler thing that allows gas to escape and put it in a dark, cool room until the bubbling stopped - which took about a month, maybe two.


Once we were sure that the fermentation had stopped it was time to transfer the wine into bottles.  We had saved a bunch of bottles over the months for just such an occasion.  First we had to sterilize the bottles by soaking them in a bleach solution and then rinsed them with hot water.  We set the clean bottles in the sun to dry.


Once the bottles were dry we filled them with our wine and corked them with a corker.  Without a corker I think it would be darn near impossible to get those things to fit inside the bottle! 


The finished product tasted a whole lot like wine, though maybe not as strong as some of the stuff you can find at the store.  For a red wine it was not as dry as they normally seem to be and was a bit sweeter than what you would expect.  This one batch of wine filled about 30 wine bottles which sounds like a lot, but once you start giving them away, it really isn't that much. 


A few weeks later we discovered that our fermentation may not have been finished - our wine became fizzy like champagne.  Either that or we used the wrong kind of yeast.  Thankfully we gave away and drank it fast enough that no bottles exploded on us (or anyone else).  Guess we have to do a little more research on how to tell when your wine is finished.

Sunday, February 17, 2013

Hiking in Colorado

I have always adored going for long walks in the woods.  In Illinois I knew every trail in the nearby forest preserves and hiked them every chance I got.  Here are some pictures from the conservation area back home:


That place was fun to hike and beautiful in it's own right even though now it seems small to me.
Since moving to the mountains hikes have taken on a whole new meaning.  There are very few level places to hike.  You are always going either up or down.  You feel sore in ways that you never imagined were possible.  (Who knew you had muscles there?)  You learn that sometimes going up is much easier than coming down.
 
About five minutes behind our house is some BLM land with trails that can go down to the Gunnison River which sounds deceivingly simple.  This first problem we ran into was the roads to reach the trailhead.  The main roads through the BLM are decently maintained dirt roads that are passable by most vehicles on most days.  The roads to the trailheads are also dirt roads - one way tracks, not well maintained.  Some of them wind around steep cliffs and are strewn with boulders.  Needless to say my car won't make it to some of the trailheads.  One of the ones we can reach is Duncan trail.  Duncan trail is down hill almost all the way.  Getting down to the river really isn't that bad as long as you leave early enough on a summer day.


It's the getting back out thats hard.  It is all uphill from here.
 
 
If you leave too late in the day you should plan on taking many shade and water breaks on the way back.  The sun out here on a summer afternoon can be brutal.
 

Saturday, February 16, 2013

What seeds I have planted this week

Last weekend marks the real start of seed planting for me.  I've planted four kinds of lettuce, celery, brussel sprouts, spinach, chamomile, and cumin.  The plan is to plant another batch of all of these in a few short weeks so I can attempt to lengthen my harvest times.  Lettuce tends to bolt in our hot, dry summer, so an early start is essential for them. Hopefully if the weather cooperates I will be able to plant them out under cover in about 4-6 weeks (as long as they all sprout).  I have a very limited amount of space for seed starting in my house, so rotating crops is a must if I want to fit them all in.

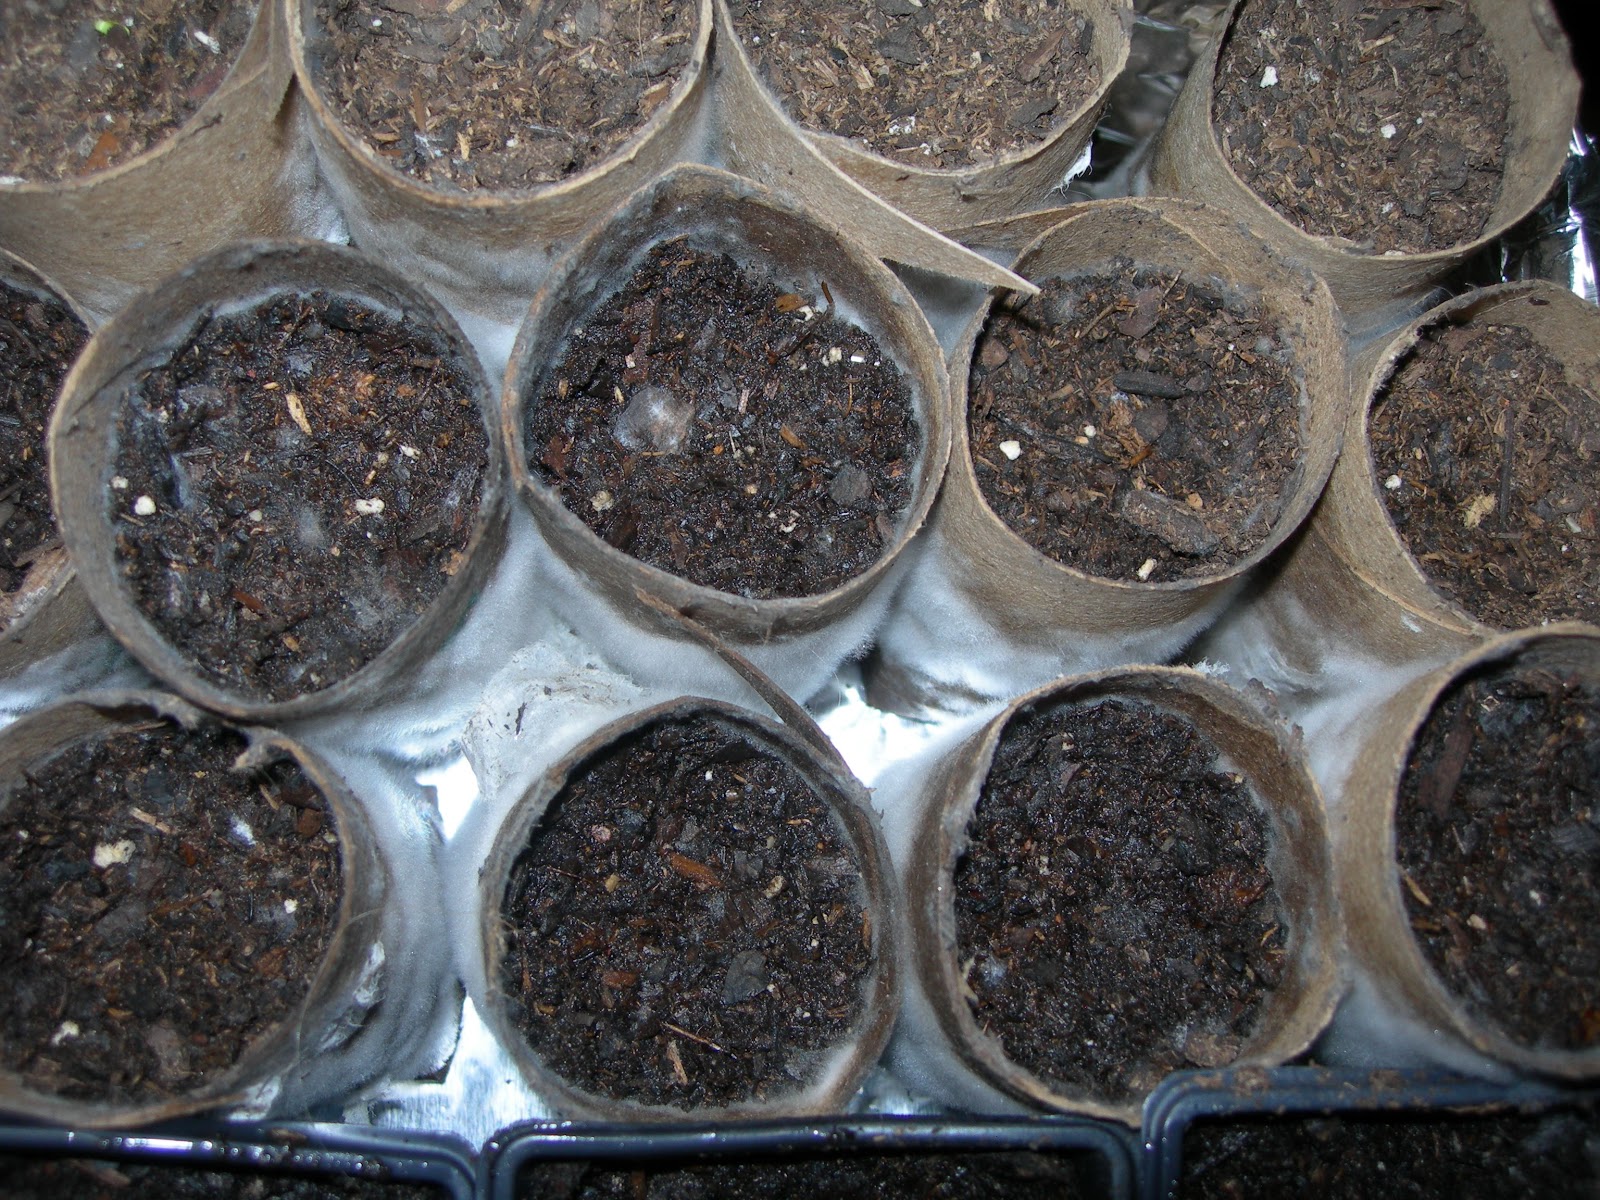
I am trying out the used paper towel roll idea for some of my seeds this year to see how it does. So far, the spinach and some of the lettuce have begun to sprout, but there is also a thick white mold growing on the outsides of all the rolls. I don't know if that will go away once I uncover them, but I hope it doesn't hurt the seedlings. I may have to rethink this idea.

The first of the spinach seedlings!
 
 
I am also worried that they won't hold up long enough to make it to planting outside.  On the plus side, maybe the mold means they are super biodegradable once they get out in the dirt - kinda like a peat pot - maybe better?